Mastering Dental Photography: A Guide
The bracketing technique requires three pictures to be taken (some digital cameras offer an automatic bracketing exposure). The first picture is captured at what is believed to be the ideal exposure (f-stop); the second at no more than two f-stops higher, and the third at no more than two f-stops lower, than the original exposure. The three pictures will document the subject at a graduated range of exposures, which increases your chances of capturing an image with accurate color fidelity. This technique is useful for capturing tooth shade and for calibrating the camera’s auto-exposure mode, says Remi Goulet of SSFODF, a French Orthodontists association. Images captured using slide film, for example, will vary even if the film is over- or underexposed by only one-third of an f-stop.
 Aperture-priority mode also allows some control over depth of field. With a 100-mm lens, for example, the depth of field is quite shallow. For capturing &mil, such as an occlusal view, the aperture may need to be stepped down (decreased) to increase the depth of field. Most auto-exposure systems allow you to set the aperture to f/8 for full-face shots and f/22 or f/32 for 1:2 and 1:1 shots.
A camera that has an auto-focus feature is a nice convenience for consumers, but in dental photography it can make framing consistency difficult. An auto-focus is designed to select which part of the subject should be in focus. Cameras with a manual focus allow you to set the magnification and then move back and forth until the subject comes into focus. Thus, for framing consistency, it’s best to choose a camera that allows manual focusing. If your eyesight isn’t what it once was, some cameras allow adjustment of the viewfinder to the correct diopter.
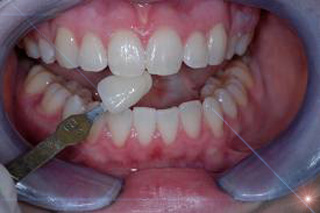
Flash attachments
The lens should include a ring light attachment with a point light that rotates around the ring for capturing tooth topography and portraits. A ring light is a unique light source that ensures completely shadowless, but concentrated, uniform illumination for high contrast or high key lighting; a point light creates a shadow to reveal topography, shape, and contour and can be rotated 360[degrees]. The Washington Scientific Camera Inc., based in Seattle, Wash., incorporates a dual-point light system, rather than ring and single-point light system. This method also produces excellent lighting results, but availability is limited.
Point lights can cause red-eye in portrait shots if the flash is positioned too close to the lens axis: the flash light bounces off the retina of the eye and into the camera lens, causing the retinal reflection to be recorded. A good system that avoids this problem is the Lester Dine ring and point flash system.
Lighting and color temperature
The color temperature of light is measured in degrees Kelvin (K) and represents the ratio of red and blue in light. Red light is warm and has a lower Kelvin rating than blue light. Average noontime sunlight is approximately 5,500 K. For proper color, your camera’s flash attachment should imitate the color temperature of noontime sun.
Ambient light may also affect the color accuracy of photographs. This is less likely when taking intra-oral photographs because the intensity of the ring and dual-point lights and their close proximity to the subject generally “white-out” ambient light.
However, when using a point light to shoot portraits, ambient lighting can affect the color of the captured image. To minimize this potential effect, use daylight spectrum overhead lighting rated at 5,500 K.
Another consideration is the color of the walls and ceilings in the area of the laboratory designated for shade-taking. Walls and ceilings reflect light. Blue walls reflect blue light and add “coolness” to photos; red walls add warmness. Take this into consideration, particularly if bounce lighting will be used to illuminate the patient. White and off-white walls and ceilings are recommended, not only for photographic purposes but also for your own visual acuity. Finally, keep an eye on what the patient is wearing. Bright clothing and lipstick can affect the perceived color temperature of captured images.
Film and color temperature
Film manufacturers often add warm or cool color biases to their films. In dental photography, it’s important to capture images that are as close as possible to natural color. Therefore, use a neutral color-balanced film. Another advantage of these films is that they are manufactured for professional use. This means they are produced to tighter tolerances, which limits variation from roll to roll.
If you use more than one roll of film to capture a series of patient views, make sure each roll is from the same manufacturing lot.
Film ages over time and this can affect its performance, so never use outdated film. Finally, some professional films require refrigeration, while others do not. If your film has been refrigerated, always allow it to warm to room temperature before using it; this prevents condensation from forming on the film.
Photo processing
Photo processing can affect the color bias of photographs. Find a processing lab that understands the needs of professional photographers. You may find such a lab in your community, or you may find it more convenient to send your film to an out-of-town lab such as Qualex Inc., in Fair Lawn, NJ, a Kodak subsidiary. They now have a prepaid mailer you can use for processing Kodak Dental Photographic Print and Slide film.
Make sure the lab you use can accommodate your need for consistent processing, and that it employs a staff trained to master nuances of processing time and temperature. After you’ve chosen a lab, work with them so they understand the need to get as close as possible to neutral color.
Some processing labs use equipment that automatically corrects “improper” exposure settings. If you bracket your photographs, this type of equipment will automatically lighten your underexposed frames and darken your overexposed frames. So, verify that your photo processor does not compensate for “perceived” photographer error.
Mastering dental photography takes time and practice. But the payoff is significant.
Your Words + MIne